Quick and Easy Crochet Blanket Patterns Free: Star Design Guide
Table of Contents
quick and easy crochet blanket patterns free: Introduction to Crocheting a Star Blanket
Introduction to Crocheting a Star Blanket
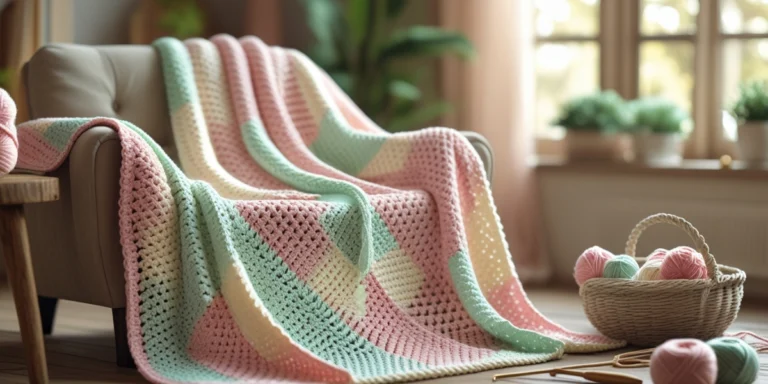
Imagine snuggling up with a cozy star-patterned blanket on a chilly evening. It feels warm and comforting. Making such a blanket is simpler than you might think. This tutorial will instruct you on crocheting a gorgeous star pattern to keep you snug.
Crocheting a blanket is a calming hobby. Our detailed guide will support you in creating a striking star blanket crochet design. It’s something you’ll treasure for many years.
Key Takeaways
- Learn the basic stitches required for the star blanket crochet pattern
- Grasp how to decipher crochet patterns and comply with the guidelines.
- Create a beautiful star-patterned blanket with our step-by-step guide
- Customize your blanket with different yarn colors and textures
- Troubleshoot common mistakes and fix errors in your crochet work
Getting Started with Your Star Blanket Crochet Project
Before you start crocheting your star blanket, it’s important to know what you’re getting into. You need to understand the skill level, time commitment, and the blanket’s size.
Skill Level Requirements
The star blanket crochet project is perfect for beginners with some crochet basics. If you’re skilled in single crochet, double crochet, and crocheting in a round, you’re set to begin. Beginner crochet blanket patterns use simple stitches and patterns, making it easy to learn and finish.
Time Commitment
Crocheting a blanket takes a lot of time. The amount of time required hinges on the blanket’s size and your crocheting pace. If you’re new or short on time, start with a smaller project.
Final Blanket Dimensions
The final size of your star blanket depends on the yarn, hook, and pattern. Aim for 30×40 inches for a baby blanket and 50×60 inches for a throw. Knowing the size helps you plan your project.
By thinking about these factors, you can plan your crochet blanket patterns for beginners project well. Whether it’s for yourself or a gift, an easy crochet blanket patterns project like this star blanket is very rewarding.
Essential Materials for Your Star Blanket
To make a stunning star blanket, picking the right yarn and tools is key. It’s essential to gather the proper materials prior to beginning. This ensures a fun and successful crochet project.
Yarn Selection and Quantities
Picking the correct yarn is vital for your star blanket’s success. The yarn’s type and amount affect the blanket’s look, size, and feel.
Best Yarn Types for Blankets
Acrylic yarns are great for star blankets because they’re soft, durable, and easy to care for. Cotton and blends are also good, offering different textures and warmth. Think about the fiber content, weight, and color to match your project’s needs.
Color Combinations for Star Patterns
The colors you pick can really make your star blanket stand out. You can go for monochromatic, complementary, or gradient colors. Contrasting colors make the stars pop, while harmonious colors create a calming look.
Crochet Hooks and Sizes
The size of your crochet hook affects the blanket’s tension and size. For star blankets, use a hook between H (5mm) and J (6mm). This depends on the yarn and the fabric you want.
Additional Tools and Notions
You’ll need more than just yarn and a hook for your project. You’ll need scissors, a yarn needle for weaving ends, and stitch markers to mark your place.
With the appropriate tools and supplies, you’re prepared to craft a lovely star blanket that will be valued for years.
Understanding Crochet Terminology for This Project
Starting your star blanket crochet project? Knowing the key terms and stitches is key. Crochet patterns use special abbreviations and stitches that might confuse beginners. We’ll cover the essential terms you need to know for your star blanket.
Common Abbreviations Used
Crochet patterns use short forms to make instructions clear. You’ll see ch for chain, sc for single crochet, and dc for double crochet. Familiarity with these abbreviations is key to accurately following the pattern.
- ch: chain
- sc: single crochet
- dc: double crochet
- st: stitch
- sl st: slip stitch
Special Stitches for Star Patterns
The star blanket pattern employs distinctive stitches to shape its look. The star stitch and cluster stitch are key for this project.
Star Stitch Technique
The star stitch makes the star points. You’ll work several stitches together to form a star point. This stitch is crucial for the star shape.
Cluster Stitch Method
The cluster stitch brings richness and volume to the blanket by grouping several stitches into one unit.
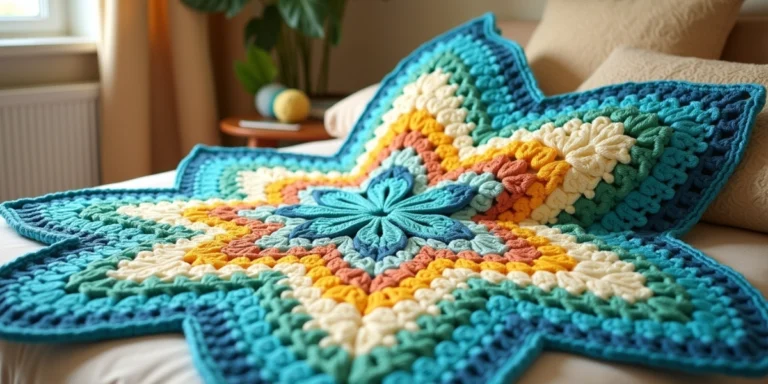
Quick and Easy Crochet Blanket Patterns Free: The Star Design
Making a star blanket is a fun way to create something cozy and personal. It’s great for beginners and looks amazing. We’ll show you how to pick a pattern, choose colors, and start your project.
Why Star Patterns Work Well for Beginners
Star patterns are perfect for beginners. They use simple stitches that are easy to learn. This makes them ideal for those new to crochet.
The star design is also very forgiving. Small mistakes won’t ruin the blanket’s look. Plus, it’s worked in rounds, making it smooth and enjoyable to crochet.
Pattern Variations to Consider
There are many ways to make your star blanket unique. Try different yarns, colors, and hook sizes. You can also mix up the stitches or add textures like bobble stitches.
Change the star’s shape by adding more points. This enables you to produce a blanket that’s exceptionally distinctive.
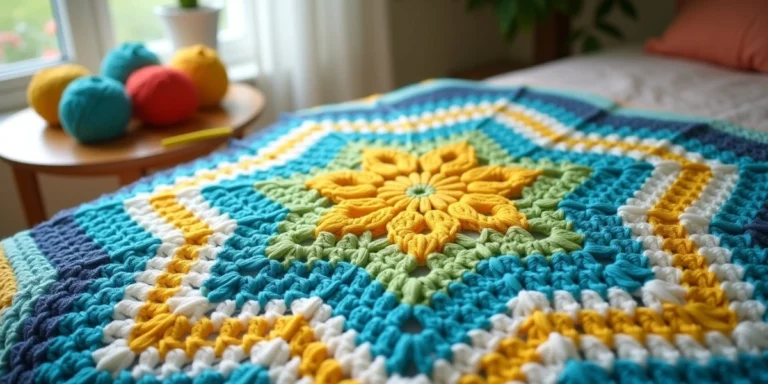
Choosing Your Color Scheme
The colors you choose will make your blanket stand out. Go for a single color or mix and match. Think about the person who’ll get it or where it’ll go.
For something modern, try a gradient effect. This changes the color smoothly, making your blanket stylish and unique.
Preparing Your Foundation Chain
The foundation chain is key to your crochet blanket’s success. It establishes the proportions and structure of your creation. Getting it right is crucial for a beautiful finish.
Calculating Chain Length
To figure out the chain length, think about your blanket’s size and stitch pattern. Chain a number that’s a multiple of the pattern repeat plus extra for the pattern. For a star blanket, chain enough for even spacing of the center and points.
Tips for Even Tension
Even tension is vital for your foundation chain. Too tight or too loose can mess up your chain. Crochet steadily and refrain from tugging the yarn too tightly or too loosely.
Avoiding Common Chain Mistakes
Twisting the chain is a common mistake. It can make your blanket skew or distort. Keep your chain straight and untwisted. Also, double-check your chain count to avoid mistakes.
Foundation Chain Alternatives
Having trouble with a traditional foundation chain? Try a foundation single crochet or double crochet instead. These substitutes are more accommodating and gentle, especially for those new to crocheting.
Creating the Star Pattern: Step-by-Step Instructions
The star pattern starts with a central foundation. You can use the magic circle method or a chain ring alternative. Each method has its own benefits, depending on your skill and preference.
First Round: Establishing the Center
To begin your star pattern, you must create the center. There are two principal approaches to achieve this:
Magic Circle Method
The magic circle method makes a seamless center. Here’s how to do it:
- Create a loop with your yarn.
- Crochet the needed number of stitches into the loop.
- Draw the yarn end to cinch the loop, locking the stitches in place.
This method is great for projects where you don’t want a visible center hole.
Chain Ring Alternative
If chaining is easier for you, or if the magic circle is tricky, try a chain ring:
- Chain the needed number of stitches.
- Link the chain with a slip stitch to shape a circle.
- Crochet the initial round into this ring.
This method is simple and works well for many star patterns.
Second Round: Forming Star Points
After setting up the center, the next step is to make the star points. You’ll crochet double crochet stitches, separated by chain stitches, to form the star’s points.
For example, crochet two double crochet stitches, then chain two. Repeat this around the center. This makes the star’s initial points.
Third Round: Developing the Star Shape
In the third round, you increase stitches at the tips formed in the earlier round. This usually means working double crochet stitches into the chain spaces from the second round.
For instance, work three double crochet stitches into each chain-two space. This widens and defines the star points.
Fourth Round and Beyond: Expanding Your Star
Keep adding rounds to expand your star. Each round will make the star’s shape clearer and bigger.
To keep your star even and flat, watch your stitch count. Make adjustments as needed.
| Round | Stitches | Description |
|---|---|---|
| 1st | Magic Circle or Chain Ring | Establish the center |
| 2nd | Double Crochet and Chain | Form star points |
| 3rd | Multiple Double Crochet | Develop star shape |
| 4th and Beyond | Varies | Expand the star |
By following these steps and adding more rounds, you can create a stunning star pattern for your crochet blanket. Keep your tension even and adjust your stitch count as needed to keep the star’s shape.
Connecting Multiple Stars for a Larger Blanket
Now that you’ve crocheted your stars, it’s time to put them together. You can either join them as you go or seam them together. Each approach provides its own perks, based on your taste and the style you’re aiming for.
Join-As-You-Go Method
The join-as-you-go technique permits you to link stars as you complete them. This makes it easier to manage your work and ensures a neat join. You’ll see your blanket grow as you go.
Step-by-Step Joining Process
To join stars this way, finish the last round of one star. Then, crochet through both stars to join them. This makes a seamless join that looks great.
Maintaining Even Spacing
To keep stars evenly spaced, watch your tension and join them correctly. Consistent spacing is crucial for a professional look.
Seaming Completed Stars Together
If you like to finish all your stars first, you can seam them together. This lets you see your stars before arranging them.
Invisible Seaming Technique
The invisible seaming technique is great for a smooth finish. It weaves yarn through the stitches of stars for a nearly invisible join.
Decorative Joining Options
You can also use decorative joins to add flair to your blanket. Crochet slip stitch joins or contrasting yarn can make your blanket stand out.
Choosing the right joining or seaming method can make your blanket look amazing. Whether you go for a seamless join or a decorative seam, your finished blanket will show off your crochet skills and creativity.
Adding Borders to Your Star Blanket
A well-crafted border can make your star blanket stand out. It frames your stars beautifully and adds a personal touch. This can turn a simple project into stunning home decor.
Simple Border Options
Simple borders are perfect for beginners. They’re easy to crochet and won’t overshadow your star pattern.
Single Crochet Border
A single crochet border is a classic choice. It’s simple yet effective, working well with various yarns and colors.
Shell Stitch Border
The shell stitch border brings elegance with its curved stitches. It’s a bit more complex but still easy to learn.
Decorative Border Techniques
For a more elaborate look, try decorative border techniques. They can add sophistication or playfulness, depending on your design.
Picot Edge Border
A picot edge border adds a lacy, romantic feel. It’s made by creating small loops, giving your blanket a soft look.
Scalloped Border Design
The scalloped border design adds a whimsical touch. It’s made by crocheting curved lines, creating a flowing effect.
| Border Type | Skill Level | Aesthetic |
|---|---|---|
| Single Crochet | Beginner | Simple, Clean |
| Shell Stitch | Intermediate | Elegant, Delicate |
| Picot Edge | Intermediate | Lacy, Romantic |
| Scalloped | Advanced | Whimsical, Flowing |
Deciding on the perfect border depends on your taste, the blanket’s function, and your expertise. Whether simple or decorative, it will make your blanket special.
Finishing Touches and Blocking
After crocheting your star blanket, it’s time for the final steps. You’ll need to weave in ends and block the blanket. These steps are key to a professional finish.
Weaving in Ends Properly
Weaving in ends is a simple yet crucial step. It keeps your blanket tidy and prevents loose yarns. Use a yarn needle to thread the yarn tail through the wrong side stitches. Make sure to weave it through several stitches to secure it well.
Blocking Your Completed Blanket
Blocking can greatly improve your crochet blanket’s look. It involves wetting or steaming the blanket to relax the fibers, then shaping it to dry. This method can smooth stitches, soften the yarn, and elevate the blanket’s visual appeal.
Wet Blocking Method
For wet blocking, soak your blanket in cold water. Gently squeeze out excess water without wringing. Then, lay it flat on a towel to dry, shaping it as desired. This method works best for blankets made from natural fibers.
Steam Blocking Alternative
For those who don’t want to wet their blanket, steam blocking is a good choice. Hold a steam iron close to the blanket’s surface, allowing steam to penetrate the stitches. Then, gently shape the blanket as needed. This method is suitable for blankets made from synthetic or blended yarns.
By following these steps, your star blanket will look its best and be a treasured item for years.
Troubleshooting Common Star Blanket Issues
Even with a great pattern, you might face some challenges while making your star blanket, but don’t worry, we’ve got you covered. As you work through your project, it’s not uncommon to encounter a few hiccups that can be easily addressed with some troubleshooting tips.
Fixing Uneven Star Points
Uneven star points can be a bit frustrating, but they’re usually easy to fix. First, ensure that you’re maintaining consistent tension throughout your work. If your star points are still uneven, try re-checking your stitch count and making adjustments as needed. It’s also helpful to use a stitch marker to keep track of your starting point.
Another common cause of uneven star points is miscounting stitches or misinterpreting the pattern. Take your time to carefully read through the instructions and recount your stitches to ensure accuracy.
Addressing Tension Problems
Tension issues can significantly affect the overall appearance of your star blanket. If your blanket is becoming misshapen or the stitches are too tight or too loose, it’s likely due to inconsistent tension. To address this, try to relax your grip on the yarn and hook, and focus on maintaining a steady, even tension.
Practicing with a swatch before starting your blanket can also help you develop a consistent tension. Additionally, taking regular breaks can prevent fatigue, which can contribute to tension problems.
Solutions for Curling Edges
Curling edges can be a challenge, especially if you’re using a stitch pattern that’s prone to curling. One effective solution is to block your work as you go, or at least after completing each star. Blocking can even out stitches and ease the fabric, cutting down on curling.
Another approach is to use a border that helps to stabilize the edges. A simple single crochet border or a more decorative edging can make a significant difference in preventing curling and adding a professional finish to your blanket.
Beginner-Friendly Tips for Crochet Success
Starting a crochet project can be thrilling and a bit scary. But, with the right tips, you’ll soon be making something beautiful. As a beginner, it’s key to start with good habits and techniques. This will render your project both effective and delightful.
Managing Your Yarn While Working
One big challenge in crochet is handling your yarn. To keep things tidy, use a yarn bowl or container to store your yarn. This helps keep it clean and prevents tangles. A yarn ball winder can also make managing your yarn easier.
Taking Breaks to Prevent Hand Strain
Crocheting can be hard on your hands, especially if you’re new. To ward off hand strain, rest every 20 to 30 minutes. Extend your hands and fingers during these pauses. You can also practice movements like finger flexes and stretches to ease your hands.
Tracking Your Progress Effectively
It’s important to track your progress to stay motivated and ensure your project goes well. Use a crochet journal or planner to record your progress and note any changes. You can also use online tools or apps to keep track and stay organized.
Customizing Your Star Blanket Design
The star blanket pattern is just a starting point; you can tailor it to your taste. Customizing your blanket allows you to add a personal touch and make it truly unique.
Size Modifications
You can adjust the size of your star blanket to suit your needs. To make a larger blanket, simply add more stars or increase the number of rounds in each star. Conversely, to make a smaller blanket, reduce the number of stars or rounds. You can also modify the hook size to change the blanket’s size and density.
Color Pattern Variations
Experimenting with different color patterns can dramatically change the look of your star blanket. Try using a single color for a subtle, monochromatic design, or mix and match colors for a vibrant, eclectic look. You can also use variegated yarn to create a unique, multi-colored effect.
Texture Enhancements
To add texture to your star blanket, consider incorporating different stitches or techniques, such as the bobble stitch or cable stitch. You can also use yarns with varying textures, like chunky or fuzzy yarns, to add depth and interest to your blanket.
Conclusion
You’ve finished your star blanket crochet project. This shows your patience and skill in crochet. Starting with easy patterns like the star design helps beginners build confidence.
The star blanket pattern is great for beginners. It has simple stitches and a beautiful design. This makes it excellent for crochet newcomers. To change the blanket’s size, adjust the starting chains, rounds, or hook size.
Looking at your finished blanket, think about what you’ve learned. You’ve mastered the foundation chain and the star pattern. You also know how to join stars together.
These skills will help you with other crochet projects. You may explore more elaborate patterns and styles. This will help you grow as a crocheter.
For your next project, try different yarn weights or colors. This will make your crochet blanket unique. Easy patterns like the star design can be changed to fit your style. This way, each project shows your creativity.
FAQ
What is the best yarn to use for a star blanket crochet pattern?
The best yarn for a star blanket depends on what you like. Soft, medium-weight yarns like acrylic or cotton blends are great. They’re comfy and last long.
How long does it take to crochet a star blanket?
Crocheting a star blanket’s time varies. It depends on the pattern’s complexity, the blanket’s size, and your skill level. Simple ones can take a few days. More complex ones might take weeks.
Can I use this star blanket crochet pattern as a beginner?
Yes, beginners can use many star blanket patterns. Opt for patterns tagged as “simple” or “newbie-friendly.” Start with a basic design to hone your skills.
How can I alter the star blanket’s size?
To modify the blanket’s size, tweak the initial chains, rounds, or hook dimensions. Make sure to check your gauge for a flat blanket.
What are some common mistakes to avoid when crocheting a star blanket?
Avoid mistakes like uneven tension, wrong stitch counts, and pattern errors. Focus on your work and use stitch markers to avoid these.
Can I customize the color scheme of the star blanket?
Yes, you can pick your favorite colors. Choose ones that look good together and fit the blanket’s purpose, like for a baby or living room.
How do I block a finished star blanket?
To block a star blanket, moisten it, pull it into shape, and leave it to dry. You can also steam it gently with an iron, but be careful not to burn the yarn.
What are some tips for joining multiple stars together?
When joining stars, use the same method each time. You can join as you go or seam them together. Make sure the spacing is even for a neat finish.